Below you will find user guides for updating the Torpedo Factory Art Center website.
How to Log In
- Click on the link titled “Login” at the menu located at the bottom of the homepage.
- Once on the login page enter the username and password assigned to you and click the button Log In
- You will be redirected to your specific Main Menu page. From this page you will be able to edit all of your relevant profile information.
How to Update Artist Info
- On the left side of the page next to your artist image and underneath your name you will see a link titled Edit Profile. Click on that link.
- After clicking on the Edit Profile link, a drop-down option with multiple form items will appear. From this area you will be able to update your artist information.
- Profile Picture: From here you can upload an image to appear as your profile picture. Ideally, this will be a picture of your work, rather than of you. This picture will appear on your artist profile page and the artist search page.
- Name: Add your first, middle, and last name. This information will appear on your artist profile, unless you mark it as private.
- Display Name: This is where you choose how you’d like your name to appear on the artist list and the artist search page.
- About/Bio: Add information about yourself, your inspirations, your media, etc. that will appear on your individual artist profile page. This section does not support any HTML coding.
- Contact Info: Input your contact info in these fields. Your email is required, as it is tied to your web account, but if you would like it not to be shown you may click on the ‘Hide from Public’ checkbox.
- Artist Type: Check any of the artist categories that apply to you.
- Media Types: Use this space to be specific about your media (ex. watercolor, silk, woodblock, etc.).
- Studio: If you have a studio at the Torpedo Factory you may enter the Studio Number here. Eligible artists are welcome to add studios where they have work on view, but should be sure to keep this section updated with each new sublease.
- Studio Hours: You may input specific studio hours in this text area. Please be sure to keep this information up to date so that visitors know your availability.
- Social Profiles: This area is for any social media accounts you’d like to link to from your artist profile. Note: Most require the full URL of your social profile(ex. www.facebook.com/profilename), but for Twitter users you only need to enter your username.
- Account Info: From here you can update your password.
- *IMPORTANT* After you have input the desired information, be sure to click on the Update Profile button at the bottom of the drop down.
- On the right of the page you will notice a button titled View Artist Page, if you’d like to check to make sure all of your changes were successful click on that button and a new window/tab will open for you to view your page.
Image Sizes
Below are the requirements/recommendations for image uploads. Size the images before uploading.
Uploading media simply uploads your image to the site. In order for it to appear on your profile, you must add the media to appropriate areas. (Further directions below.)
Primary Profile Images
- Please choose an image of your artwork, rather than of yourself. Self-portraits of you, or you wearing one of your works is appropriate.
- Image Size: H: 240 px W: 240 px
- In keeping with a uniform look for the site, all profile images should be at least 240px in both height and width. Images with a height or width less than 240px will be scaled up and resolution will be lost.
- Notes: These images will be cropped so any image not at a 1:1 ratio will have part of the image cut out. Users can choose how to crop images not matching this ratio.
Artwork Images
- Minimum Image Size: W: 360 px
- Maximum Image Size: H:1200 px OR W:1200 px
- Maximum Image File Size: 1 MB
- Notes: The lightbox functionality allows your images to be viewed directly on your artist page in a large view by clicking on the + icon that will appear when hovering over the image. Due to the scaling of the images for the slider, images must be at least 360 px but can be much larger so long as the image file size does not exceed 1 MB.
Uploading Media
In order to add any images to your artist profile, you will need to upload those files to the system, first. Watch the video tutorial here:
Upload Profile Picture
- Be sure you have uploaded your profile image to the media library before proceeding. See guide above for sizing.
- From the Main Menu, click the Edit Profile link to open the dropdown for editing your Artist Information.
- Click the Update Image button under Profile Picture.
- A box window will open, click Browse Images.
- A window should open up. Navigate to the image you wish to use and click Open.
- Click the Upload Image button.
- Your image should appear and you can drag the box over the image if you wish to crop the image.
- Note: If you wish to crop the image it is best that the image you upload be bigger than the recommended 240 px by 240 px as cropping can decrease resolution. As always, it is better to crop the image before uploading.
- If you have chosen to edit the image, click “Crop Image” or “Save Image” if you wish to save the image as is.
- Note: If the image is not at a 1:1 ratio it will be auto-cropped to 240 px by 240 px.
- You will be returned to the edit profile dropdown where you will see the full sized image that will now serve as your profile picture
- Click Update Profile at the bottom of the dropdown to apply all changes
Video Walkthrough
Adding Artworks to Your Artist Profile
On your Main Menu page you, will see an Update Artworks button. Click on that button to access the area of the site that will allow you to update/add/remove your artworks. It will take you to a page that looks something like this: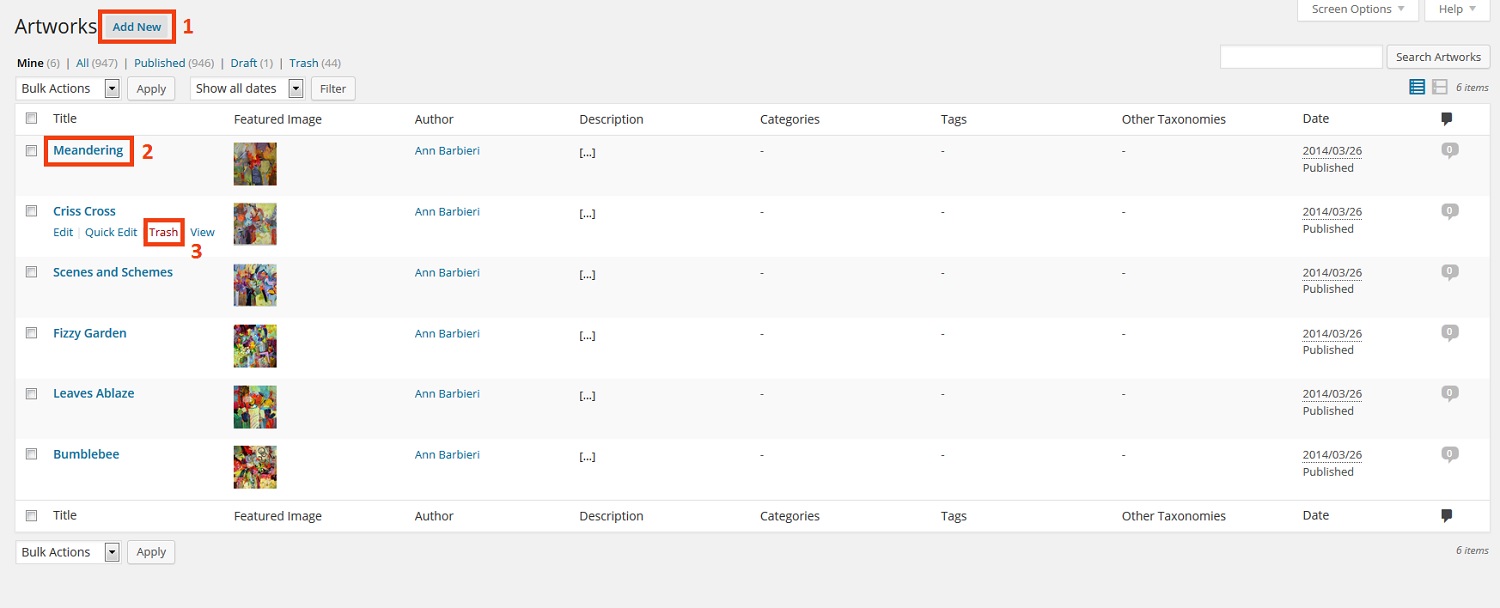
Adding and Editing an Artwork
- Be sure you have uploaded your artwork images to the media library before proceeding. See the guide above for sizing.
- To add an artwork for display on your artist page click on the Add New button (Box 1 on the image above).
- If you wish to edit an already created artwork (Box 2) click on the title of an artwork.
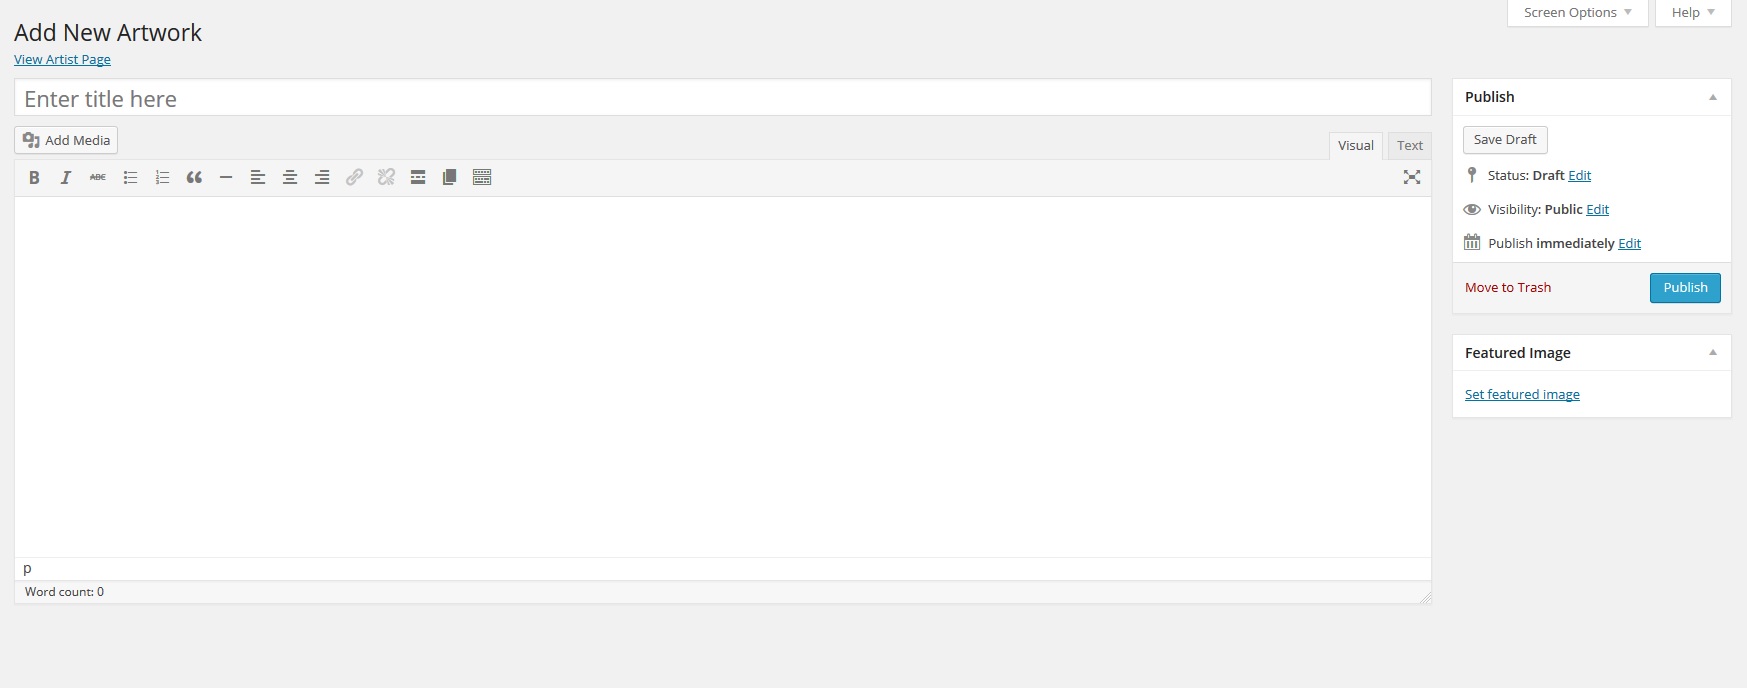
- You will be directed to a new page where you can then input/edit the information about your artwork. It looks like this:

The editor screen for adding artworks
- On this page you can add the title of your artwork, give a few details(such as media and size) and upload the image
- Title: Enter the title of your art piece in that top text field where it says “Enter Title Here”. If untitled, you can leave it blank or choose to label it Untitled if you’d prefer.
- Piece Description: The large editing box is where you can include information about your piece, such as size, medium, artist statement, etc.
- Featured Image: (bottom right column) Once you have uploaded your images to the site, select “Set featured image.” It will open a menu with images in the media library. Navigate to the image of choice and select it.
- Note: Do not skip this step, as artwork will not appear on your Artist Profile until you set a featured image.
- Publish/Update: The site auto-saves while you are working, but hit the Publish or Update Button once you are done making changes.
- View: After your page has been published or updated, this new menu appears above the title bar. Click View Artist Page to see if your artwork was correctly added to your artist page. (Opens in new window.)